
How to Make a Book in Publisher
Publishing a book can be a daunting task, but with the right tools and knowledge, it can be a fulfilling and rewarding experience. One of the most popular software programs for creating books is Microsoft Publisher. In this article, we will guide you through the process of making a book in Publisher, from setting up your document to printing your final product.
Section 1: Setting Up Your Document
The first step in making a book in Publisher is to set up your document. To do this, open Microsoft Publisher and select “New” from the File menu. From the available templates, choose “Booklet” or “Catalog” depending on the type of book you want to create.
Next, select the size of your book from the “Page Size” dropdown menu. You can choose from standard sizes such as 8.5 x 11 inches or customize your own size. It’s important to keep in mind that the size you choose will affect the layout of your book, so choose wisely.
After selecting your page size, you can choose the orientation of your pages. Most books are in portrait orientation, but if you want a landscape book, you can select that option as well.
Finally, choose the number of pages you want in your book. This will determine how many pages you have to work with and how many sheets of paper you will need to print your book.
Section 2: Designing Your Book Cover
The cover of your book is the first thing readers will see, so it’s important to make it eye-catching and professional. To design your cover, select the “Page Design” tab and choose “Create New Page” from the dropdown menu.
Next, select “Blank Page Sizes” and choose the size of your cover. You can use the same size as your book pages or create a larger cover for added impact.
Once you have your cover page set up, you can start designing. Use the tools in the “Page Design” tab to add text, images, and shapes to your cover. Be sure to include the title of your book, your name as the author, and any other relevant information.
Section 3: Formatting Your Book Pages
Now that you have your cover designed, it’s time to format your book pages. Start by adding a header and footer to each page. This will allow you to include page numbers and other important information.
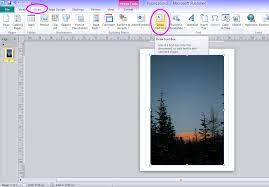
Next, use the “Insert” tab to add text boxes and images to your pages. You can also use the “Page Design” tab to adjust the layout and formatting of your pages.
It’s important to keep in mind that your book should be easy to read and visually appealing. Use a consistent font throughout your book and make sure there is enough white space on each page.
Section 4: Printing Your Book
Once you have finished designing and formatting your book, it’s time to print it. Before printing, be sure to preview your book to make sure everything looks the way you want it to.
To print your book, select “Print” from the File menu. Choose the number of copies you want to print and select the printer you want to use. You can also choose to print double-sided pages if you want to save paper.
After printing, fold your pages in half and staple them together to create a booklet. If you want a more professional look, you can take your booklet to a print shop and have it bound.
Conclusion
Making a book in Publisher may seem like a daunting task, but with the right tools and knowledge, it can be a rewarding experience. By following these steps, you can create a professional-looking book that is sure to impress readers. Remember to take your time, be creative, and have fun!


